Saturday, June 15, 2013

How to Make a Bow-Back Top!

You will need:              Credit To: Bethany Mota aka. MacBarbie07 on YouTube
Rotary Cutter
Piece of Cardboard
Scissors
A T-Shirt
Liquid Stitch

1. Place the piece of cardboard between the front and back of the shirt
2. Take the scissors and cut some of the bottom of the shirt. This fabric will be used later.
3. Take the rotary cutter and cut slits in the shirt about 4 in. apart from each other until you reach the bottom of your shirt.
4. Taking the fabric that was cut off the bottom of the shirt, create little strips by cutting them off the fabric in 1/2 in. wide sections.
5. To make the "bow" effect, pinch the first 2 slits together and wrapping the strips around it. Secure it with the Liquid Stitch.

**NOTE** When Liquid Stitching the strips onto the shirt, make sure that the ends of the strips are faceing the inside of the shirt. This helps the bows not look sloppy.  

How to Make Cute Hair Bows!

You will need:                      Credit To: Bethany Mota aka. MacBarbie07 on YouTube
any pattern of fabric
scissors
hot glue gun
hot glue gun sticks
hair clips


Red Scarlet  Lace Fabric Hair Bow, Girls Hair bow, Big Bow1. Lay the fabric your choice face down and fold a little bit of it down 2 times.
2. Cut all of the rest of the fabric off so you are left with the strip of fabric you folded.
3. If you want, you can cut a little bit off so that your bow isn't so long.
4. Fold the two opposite ends in so that they both meet. Hot glue the two ends together.
5. Take the two openings on the sides and pinch them together to make a bow shape.
6. Hot glue the pinches together in the middle.
7. Take an other strip of fabric of the same pattern and hot glue that in the middle of the bow. Make sure that the end of the strip is glued in the back of your bow.
8. Take a hair clip and hot glue that where the end of your middle strip ends. You can take a small pinch in the back of the bow and glue that to the ends of the hair clip. This helps with the shape of your bow.

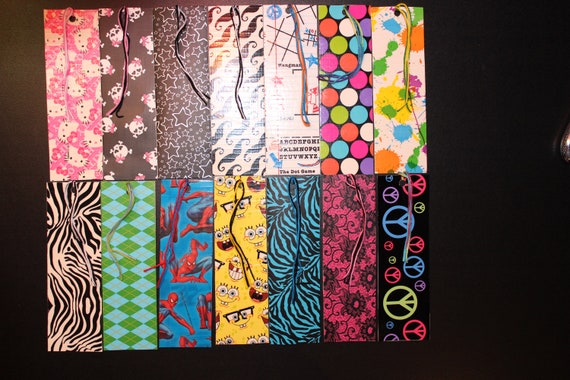
How to make a duct tape bookmark!

You will need: 
2 rolls of duct tape (Different pattern or color) 
Scissors 
Ruler  

Duct tape bookmarks1. Take a strip of duct tape and measure it out to be 6.5 in. and lay it face down (sticky side up) on your surface. 
2. Take another strip of duct tape the same size and lay it right over the first strip. If there is any sticky adhesive showing, cut it off with the scissors. 
3. Taking your other roll of tape, make a short piece about 4 in. and laying diagonally on the bookmark. Do this as many times as you like to the duct tape. 
4. Once you have finished doing that, flip over the bookmark and cut off the adhesive that is showing.    

How to do a Two-Piece French Twist!

You will need:
2 bobby pins
A brush or a comb
A Cute Bow or hair Accessory (Optional)

 1. Take a section of hair and separate it into 2 equal sections.
 2. Take the section closest to your face and twist it over the other section.
 3. Add a small piece of hair from your hairline into the section that is now closest to your face.
 4. Keep twisting and adding hair only to the section that is closest to your face. Do this until you have reached your ear.
 5. Once you have reached your ear, keep twisting your hair but don't add any more hair to it.
 6. Bobby Pin the hair in place making a "x" with them.
7. Add your hair bow at the end of the braid to finish the look off.